Configuring ACM

note icon Before you begin, you should review Configuring NDS, which contain helpful information about integrating NXT 4 access control with other environments.

To configure the ACM access control module, perform these steps.

  1. Open Content Network Manager. (Start > Programs > Rocket > NXT 4 > Online Server > Content Network Manager).
  2. Select the server node (the root node in the Content Network Manager tree).
  3. From the Action menu, choose Properties.

  4. Click the Browse button for the Access control module: field.
  5. Select 
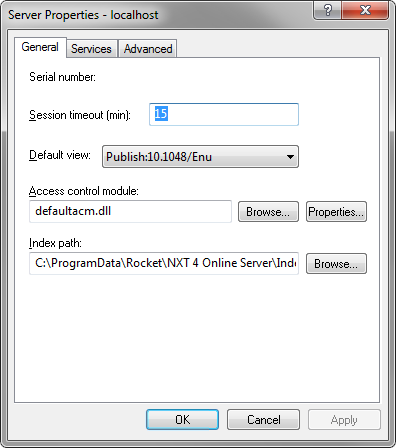
ACM and click OK to return to the Server Properties dialog box.

    warning icon If you want to disable access control altogether, simply leave the Access Control Module field blank. Be aware that if you do not enable access control, there will be no account login for Content Network Manager and your site will be completely open to tampering by unauthorized persons.

  6. Click OK to apply the changes and exit the Server Properties dialog box.
  7. Select the server node again and from the Action menu, click the Properties button.
  8. Click the Properties button for the Access control module: field.

  9. Adjust the security options to your specific requirements.

    Check Require SSL for Authentication Requests if you want to require SSL only for authentication.

    Check Allow blank passwords if you want to allow users to authenticate with a blank password (zero characters). By default, this box is cleared, which forces users to have a password of one or more characters.

    Check Allow anonymous access if you want to allow anonymous users to access the site. By default, this box is selected with the user name set to Anonymous and the password left blank.

    note icon You might want to require a password for the Anonymous user. Otherwise, anyone who logs in with the user name "Anonymous" can gain access without a password. Alternately, you can disable anonymous access by clearing the Allow anonymous access check box in the Access Control Properties dialog box, and deleting the "Anonymous" user account.

  10. Click the Data service properties button.

  11. Configure the LDAP service properties using these settings.
  12. Click the Attributes button to configure attributes for the LDAP service.

  13. Enter the required attribute information using these settings.
  14. To add a mapping, click the Add button in the Attributes dialog box.

  15. Enter an access control property and its corresponding LDAP name information.
  16. Click OK to return to the Attributes dialog box.
  17. Click OK to return to the LDAP Service Properties dialog box, and OK again to return to the Access Control Properties dialog box.
  18. In the Access Control Properties dialog box, click the Advanced button to access the Advanced Properties dialog box.

  19. In the Metering service field, enter the name of the service that processes all metering requests (if you enable metering).
  20. Set a value for the Expire Authentication cookies after field. This value determines how long a user session remains active (how long can the user be logged on).
  21. In the Properties with Document IDs field, edit the semicolon delimited list of access control properties that the Access Control Module should convert from document IDs to domain syntax, as necessary.

    Use the Add button to add items to the list. Use the Remove button to remove items from the list.

  22. After you have entered all settings, click OK to return to the Access Control Properties dialog box.
  23. In the Access Control Properties dialog box, click Test Settings.

  24. Enter the User name and Password information required to authenticate and retrieve properties for an Administrative user.

    warning icon When you are configuring ACM for the first time, if you do not add a user with "allow admin access" rights at this point, you will not be able to subsequently access the server.

  25. Click OK to test the access control properties and to ensure that the user has administrative access to log in and change settings in the future.