If you have accessed this documentation online then you have already had a look at the default site that NXT 4 creates for you during the installation process. This default site employs many of the tools and techniques covered in this documentation. With small changes to some of the default site settings, you can create a custom look and feel while at the same time leveraging the functionality of the default site.
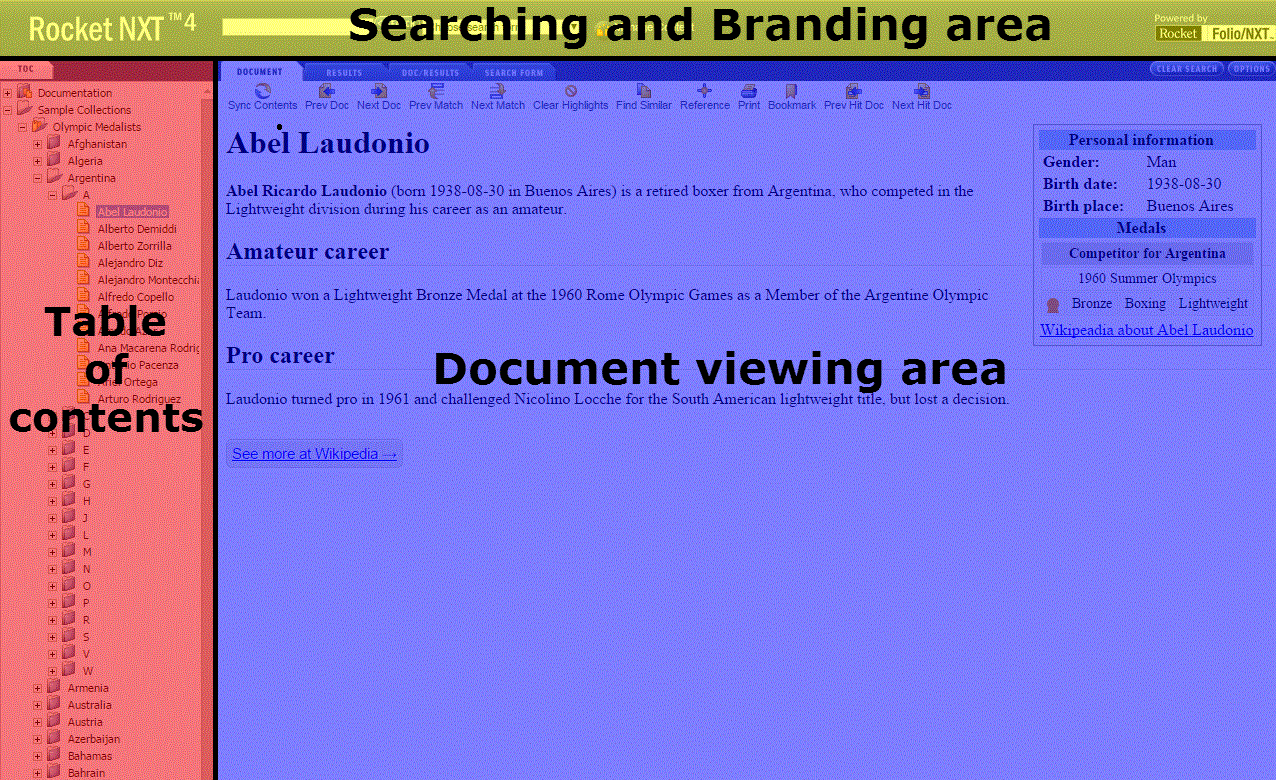
Figure 1 shows the basic areas or sections of the default site:
Figure 1. The Three Areas of the Default Site
Expand the folder nodes of the table of contents until you see a document
icon ![]() or a heading
that is underlined when you hold your pointer over it.
or a heading
that is underlined when you hold your pointer over it.
Note: Not every heading corresponds to a document. Folder nodes can contain other folders or documents, and if one of these headings is clicked, nothing is displayed in the document viewing area.
For example, click the plus icon ![]() corresponding to the folder icon
corresponding to the folder icon ![]() next to Sample Collections, then Country Quick Facts, then Africa,
and finally Algeria. Your table of contents now looks like
this, and if you click one of the documents it will be displayed in the
document viewing area:
next to Sample Collections, then Country Quick Facts, then Africa,
and finally Algeria. Your table of contents now looks like
this, and if you click one of the documents it will be displayed in the
document viewing area:
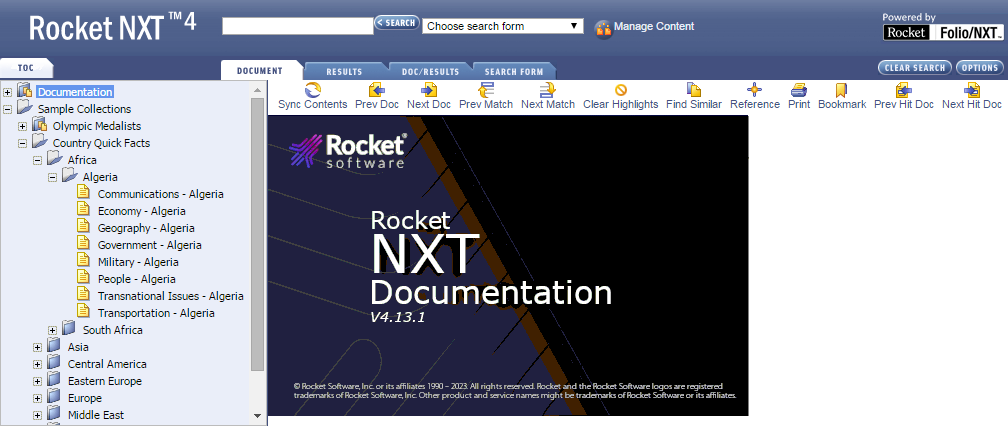
Figure 2. Table of Contents - Subsequent Levels Expanded
The document viewing area will not change or update until you click on a document or a folder that contains a document in the Table of Contents.
To view a document on your NXT 4 site, simply navigate the table of contents and click on a document icon or underlined heading. Click on the first document in the Algeria folder that is called Communications-Algeria.
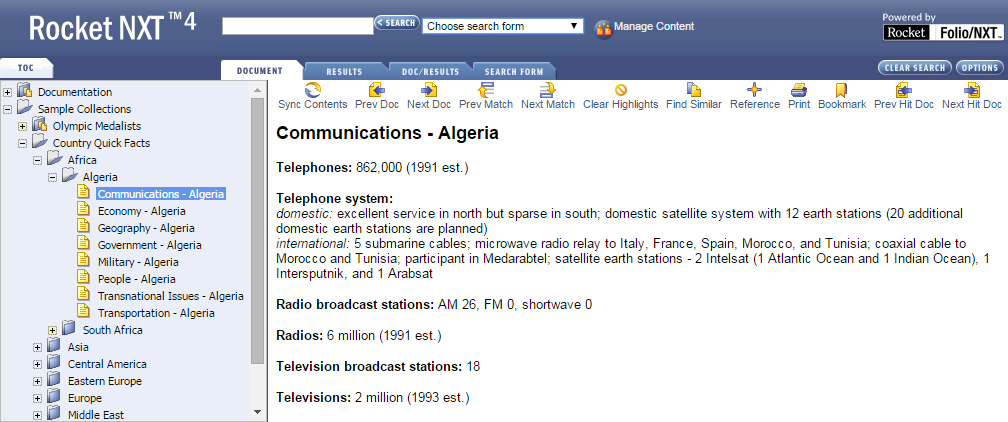
Figure 3. Viewing a Document
The document you selected is displayed in the Document tab. Across the top of the document viewing area are tabs that allow you to change your browser view. The tabs are:
The default site opens with the Document tab selected so that you can view documents on your site. To change the view, click on a different tab. The selected tab changes automatically based on what you are doing within your site (for example, the Results tab is displayed after a search). Automatic tab selection is described in greater detail in the Searching the Site section of this document.
The Document tab contains your selected content and a toolbar, which you will find most useful after running a search.

Figure 4. Document Tab with Toolbar
The toolbar is described in greater detail in the Navigating Search Results or Documents section of this documentation.
Searching for content on the default site, or within NXT 4, is comprised of the following steps:
On the default site, there are many different ways that you can run a search. All searches start by typing what you want to search for into a search form. In short, a search form is a web page that contains one or more fields where you can type words/terms on which to search. The easiest and most readily accessible search form is the Search field, located at the top, middle-left of the default site.
Figure 5. Search Area - Search field
This search form enables you to do a simple keyword search on the default site
content. Type the word coastal
in the Search field. Notice that your search results automatically display
in the Results page.
Alternatively, you can choose to perform a search using one of four search forms provided:
You can access these search forms using the Choose search form list located next to the Search field. If you select a search form from the Choose search form list, the Document tab changes to the Search Form tab.
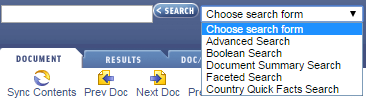
Figure 6. Search Area - Choose Search Form List
When you run a search, the Results tab is automatically selected and
displays the list of search results. The list contains all documents that
contain a match to the specified search string. If you performed the
search for coastal that is suggested in the previous section, you see the following in
the document viewing area:
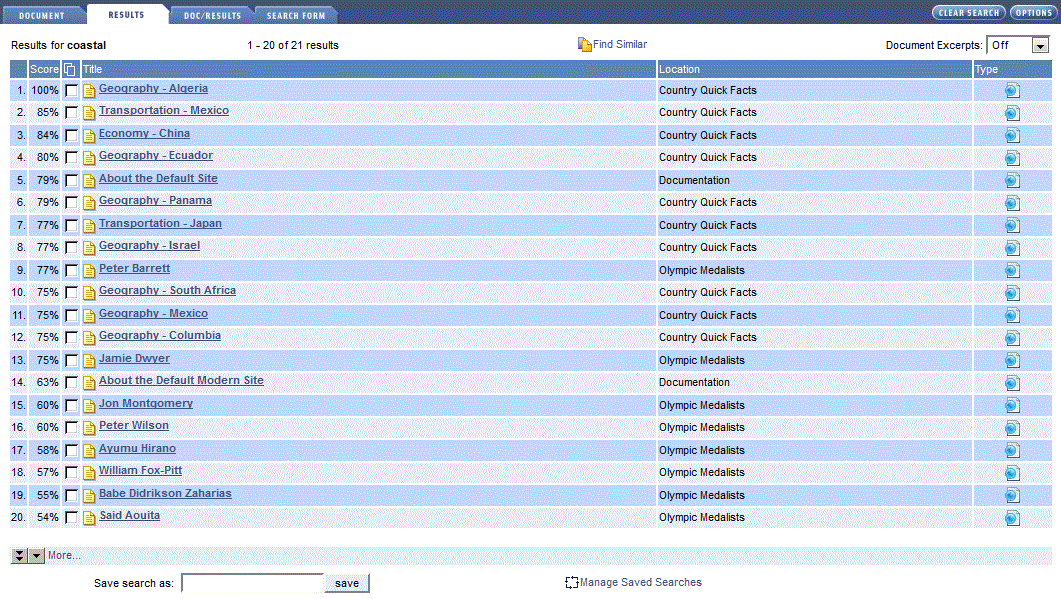
Figure 7. Results Tab
The Results tab provides you with information regarding your search.
Terms that you search for are displayed at the top of the Results
tab in the Results for field. The tab also indicates which batch
of results you are currently viewing out of the total number of results NXT
found (for example, 1-10 of 10 results). You can also select the Find
Similar option to find similar documents or the Document Excerpts option to view
document excerpts.
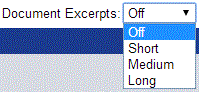
Figure 8. Choosing Document Excerpts Type
Use the Document Excerpts list to alter the amount of surrounding context information displayed for each result. The context can help you determine whether a document is what you are looking for. Choose Short, Medium, or Long for the number of words of context to display on each side of the match.
The body of the Results tab contains the list of results. The information in this list is arranged in the following columns:
The Save search as field at the bottom of the Results tab allows you to save and reuse common search syntax. If a specific search locates the information you need, saving the search makes it easier to find the same content the next time you need to search for the information. You can save multiple searches, and NXT 4 stores saved searches as part of your user preferences. However, note that saving a search only saves the query, it does not save the results list.
To save your search, type a name for the search in the Save search as field and click Save.
Figure 9. Saving a Search Query By Name
The name for your search query should be descriptive and remind you of the purpose of the search.
Note: The saved search name must not contain the following symbols:
When you save your first search, a new list is displayed to the right of the Choose search form list. You can recall your saved searches by selecting it from the Choose Saved Search list.

Figure 10. Choosing a Saved Search to Run
You can rename or delete saved searches by clicking the Manage Saved Searches link to the right of the Save search as field at the bottom of the Results tab.
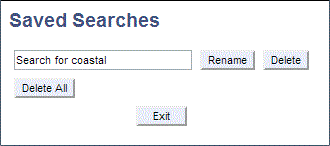
Figure 11. Manage Saved Searches Dialog
When you click a document in the search results list, the document opens in the Document tab to the first paragraph containing the match. Try it now: Click the first document in the search results list. Note that the word coastal is highlighted in the document. To jump to the next highlighted matches in this document, click the Next Match icon in the toolbar. After viewing the document, if you want to go back to your list of search results, click the Results tab again.
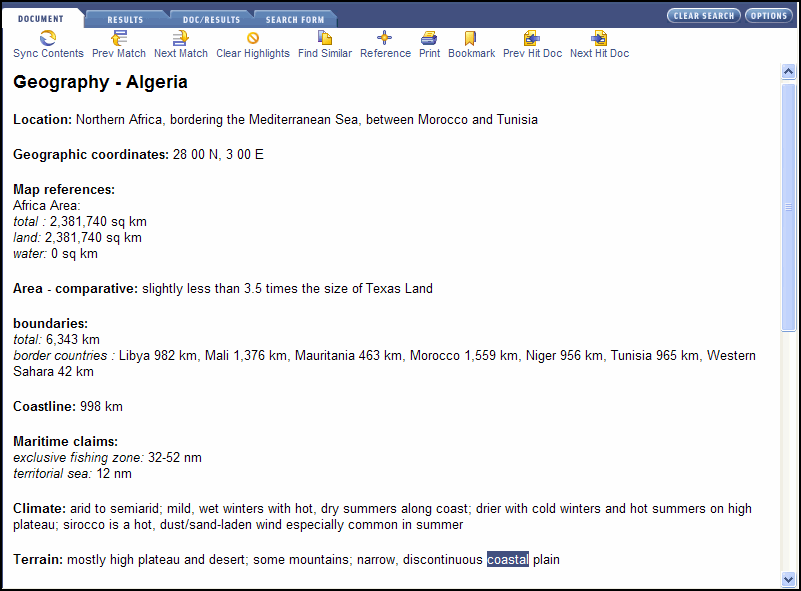
Figure 12. Viewing a Document From the Results List
Another viewing option that you can select is the Doc/Results tab.
The Doc/Results tab horizontally splits the browser window into two frames that enable you to view the document and the results list simultaneously. Any time after running a search, click the Doc/Results tab and to view a split screen similar to the following figure:
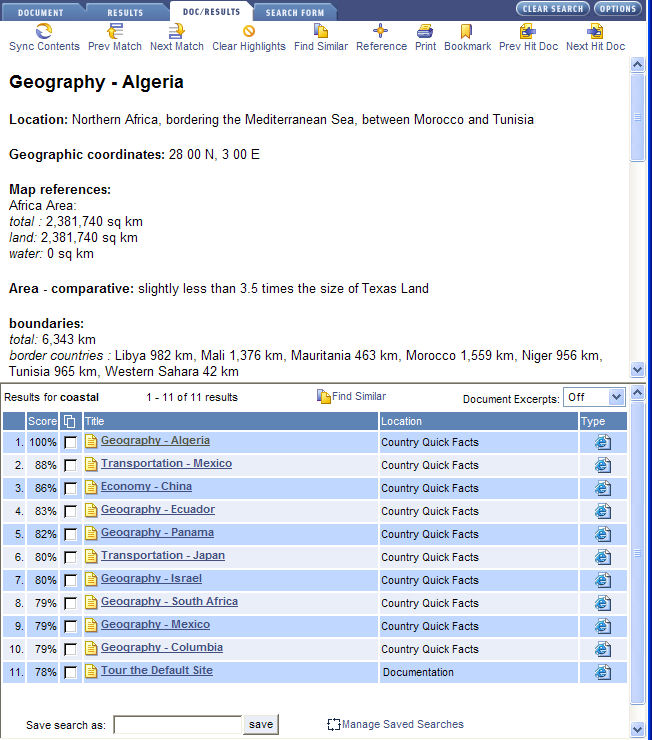
Figure 13. Doc/Results Tab
For detailed explanations of the Doc/Results tab fields, refer to the Document tab and the Results tab portions of this document.
After selecting a document from a list of search results, you can scroll through that document to identify all of its matches. Alternatively, you can use the tools in the Document toolbar to navigate the search results and documents.
Figure 14. Document Toolbar
The tools in the Document toolbar include:
You can set options for the Table of Contents.
To access the Options page, click the Options button at the right of the toolbar. Figure 15 shows the NXT Options page.
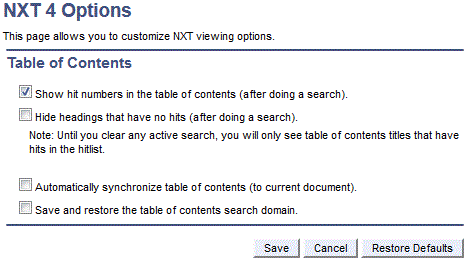
Figure 15. NXT Options page
On the Option page, you can set the following options:
Note: When displaying hit numbers in the Table of Contents, the total number of hits will vary depending on the type of query you perform. For Boolean queries, the total number of hits displayed should be the total number of hits for the query. For relevancy ranked queries, the total number of hits displayed is limited to the maximum number of hits specified in the query template for a single content collection; this value is typically set to 100. For example, if you perform a ranked search across four content collections, you could receive a maximum of 400 hits. In this case, the TOC does not display hit numbers for more than 400 documents, even if there are other documents at the bottom of the relevancy scale that contain hits.
For interface designers, you may change the default value using the xhitlist_mh (xhitlist max hit) parameter in your search form. Increasing of the max hit parameter could have a negative performance impact.
The branding area for this site is at the top of the page. When you install NXT, the Rocket NXT 4 logo is displayed on the default site. You can change this branding to suit your company's needs. For more information, see Modifying the Default Interface.
Along with setting up an initial site for you, NXT 4 also places some content on that site. The content is organized in two main parts:
Most documents in NXT Documentation are HTML files. However, within the Sample Collection content includes HTML, XML, Microsoft® Word documents, and Adobe Acrobat® PDF files. This collection demonstrates the flexibility of NXT 4 to create, display, and search content that may have been created in a variety of formats.
Copyright © 2006-2023, Rocket Software, Inc. All rights reserved.